Ever wondered how many people visit your website? Or where they come from? Google Analytics 4 (GA4) has all the answers, but many find it tricky to set up.
In this guide, I’ll show you how to add Google Analytics to your website, no matter what platform you’re using. You’ll learn how to set it up, what it can do for you, and how to start getting valuable insights about your visitors.
Why Add Google Analytics to Your Website?
If you’re wondering if Google Analytics is worth the effort, trust me, it is. Here’s why:
- Make Smarter Decisions: GA4 gives you real data to guide your choices. No more guesswork.
- Understand Your Visitors: Find out where they’re coming from, what pages they visit, and how long they stay.
- Track What Works: See which marketing campaigns are bringing in visitors and sales. For example, you might discover that Instagram followers are your best customers.
- Improve Your Website: Spot problem areas quickly. If visitors always leave on a certain page, you know it needs work.
- Stay Privacy-Friendly: GA4 is designed with privacy in mind, helping you comply with laws like GDPR.
Let’s imagine you run an online store. GA4 shows you that mobile users make up 70% of your traffic but only 30% of your sales. That’s a clear sign your mobile experience needs improvement.
The best part? Google Analytics is free. It’s like giving your business superpowers without spending a dime.
To dive further into the details, see our take on the Google Analytics pros and cons.
How Do You Use Google Analytics?
Once you’ve set up GA4, you might feel overwhelmed by all the data. Don’t worry – I’ll break it down for you.
Here are some key reports you’ll want to check out:
Realtime Report
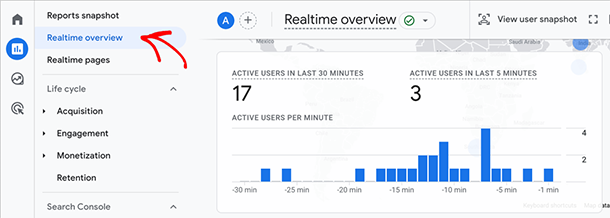
This shows you what’s happening on your site right now. It’s great for seeing immediate results from a new post or campaign.
Audience Overview
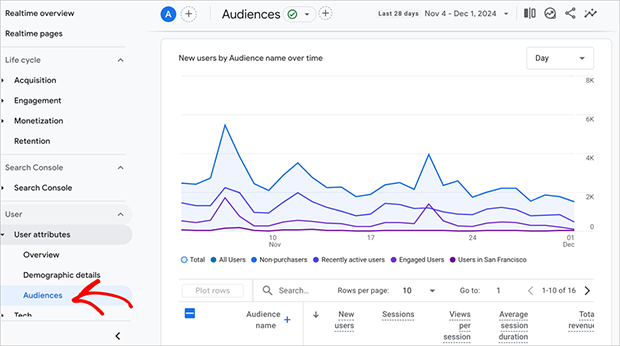
This report gives you a snapshot of who’s visiting your site. You can see details like where they’re from, what devices they’re using, and how often they return.
Acquisition Reports
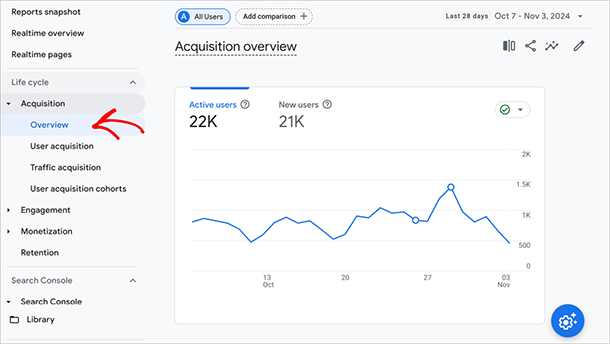
These tell you how people are finding your site. Are they coming from Google searches, social media, or other websites?
Now, let’s look at how you can use this data:
- See Top Traffic Sources: Find out which sites or platforms are sending you the most visitors. Maybe you’ll discover that Instagram is driving more traffic than you thought!
- Understand User Behavior: See which pages people visit most and how long they stay. This can help you focus on your most popular content.
- Track Conversions: Set up goals to track important actions on your site, like newsletter sign-ups or product purchases.
- Measure Campaign Success: See how well your marketing efforts are paying off. You can track specific campaigns to see which ones bring in the most visitors or sales.
Remember, GA4 is powerful but can be complex. If you want to dive deeper, see our Easy Google Analytics 4 guide for a more detailed walkthrough.
And if you’re looking for a simpler way to see your key metrics at a glance, stay tuned – I’ve got a great solution coming up later in this article.
How to Add Google Analytics to Your Website
Now that you know why Google Analytics is so valuable, let’s get it set up on your website. Don’t worry – it’s easier than you might think.
Getting Your GA4 Tracking Information
Before we dive into adding the code to your site, you need to get two important pieces of information from Google Analytics:
- Your Measurement ID: This is a unique identifier for your GA4 property. It always starts with “G-” followed by a series of numbers and letters (like G-XXXXXXXXXX).
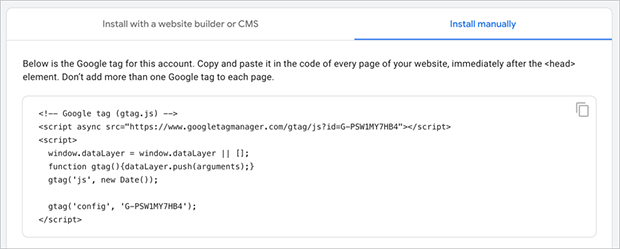
- The global site tag (gtag.js) code snippet: This is a small piece of JavaScript code that you’ll need to add to your website. It looks like this:
<!-- Google Analytics -->

<script async src="https://www.googletagmanager.com/gtag/js?id=G-XXXXXXXXXX"></script>

<script>
  window.dataLayer = window.dataLayer || [];
  function gtag(){dataLayer.push(arguments);}
  gtag('js', new Date());
  gtag('config', 'G-XXXXXXXXXX');
</script>
Remember to replace ‘G-XXXXXXXXXX’ with your actual Measurement ID.
Now, let’s look at how to find these details.
First, sign in to your Google Analytics account and go to the Admin section (look for the gear icon at the bottom left).
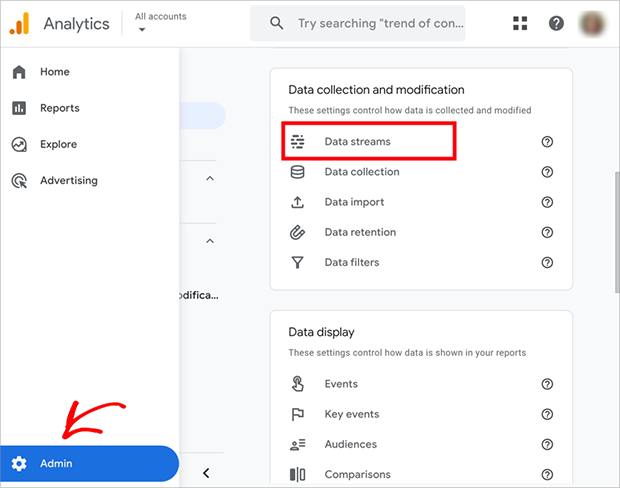
Now, in the Property column, click on “Data Streams” then, go ahead and select your website’s data stream.

Here, you’ll see your Measurement ID at the top of the page.

To get the gtag.js code snippet, click on the “View tag instructions” option.

From there, select “Install Manually”. You’ll see a box with some code, which is what you’ll need to add to your website.
Adding the GA4 Tracking Information to Your Website
Now that you have your GA4 tracking information, it’s time to add it to your website.
The general process involves adding the global site tag (gtag.js) code to the <head> section of your website’s HTML. This ensures that Google Analytics can track all pageviews and events on your site.
The exact method for adding this code can vary depending on the platform you’re using for your website. In the following sections, we’ll walk through how to add Google Analytics to some of the most popular website platforms.
Enhanced Measurement in GA4
Google Analytics 4 offers an “Enhanced Measurement” feature that automatically tracks additional events on your website without requiring any extra code.
This feature includes tracking for:
- Page views
- Scrolling
- Outbound clicks
- Site search
- Video engagement
- File downloads
To ensure Enhanced Measurement is enabled, go to Admin » Data Streams and select your website.
Look for “Enhanced measurement” and make sure it’s turned on.
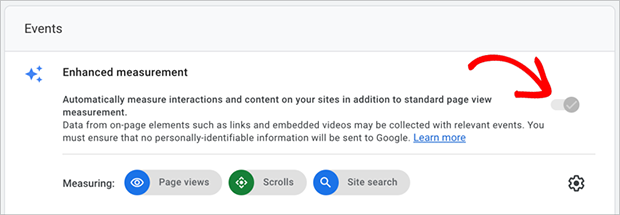
Enabling this feature ensures GA4 can track important events on your site automatically, giving you more detailed insights into user behavior.
How to Add GA4 to Popular Website Platforms
As I mentioned earlier, the exact method for adding this code can vary depending on the platform you’re using for your website. Let’s walk through how to add Google Analytics to some of the most popular website platforms:
Adding Google Analytics 4 to WordPress

WordPress powers over 43% of all websites, and for good reason: it’s versatile and user-friendly.
If you’re using WordPress, you’re in luck because adding Google Analytics 4 is a breeze, especially with plugins like MonsterInsights.

With MonsterInsights:
- You don’t need to touch any HTML or risk breaking your site.
- The plugin keeps your GA4 integration up-to-date without you lifting a finger.
- You get additional tracking options and easy-to-read reports right in your WordPress dashboard.
How to Add GA4 Using MonsterInsights
To get started, you’ll need to install MonsterInsights.
Head over to the Plugins section in your WordPress dashboard, click “Add New,” and search for “MonsterInsights.”
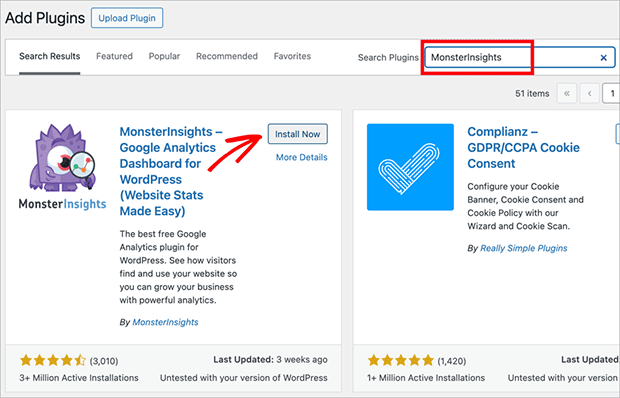
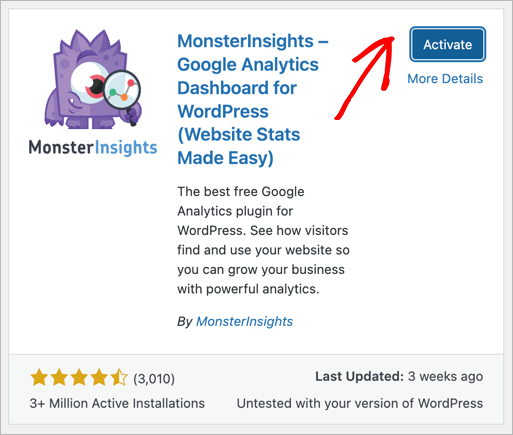
Once you find it, just click “Install Now” and then “Activate.”
After activation, you’ll see a welcome message with a “Launch the Wizard!” button. Click it to start the setup process.
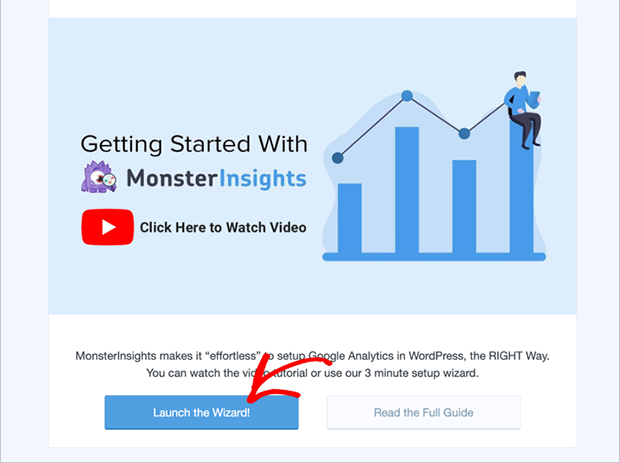
The wizard will guide you through choosing your website category and connecting to Google Analytics.

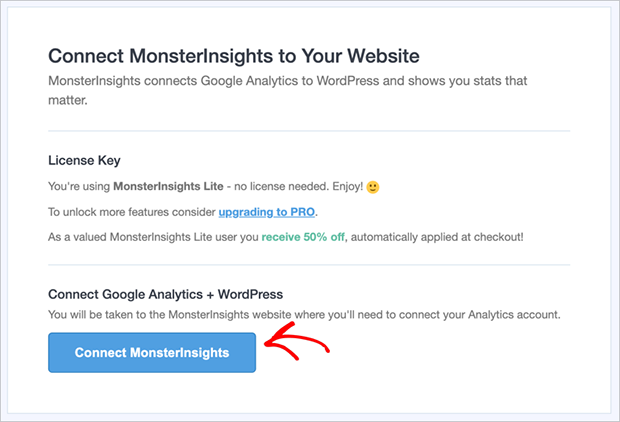
When you reach the connection step, click “Connect MonsterInsights” and select the Google account you use for Analytics.
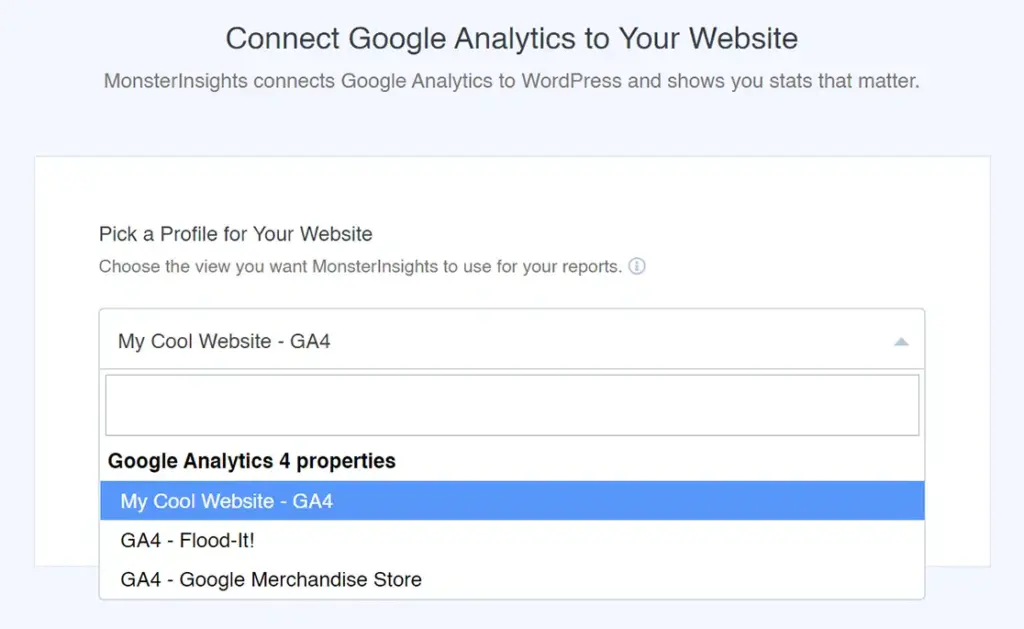
You’ll then be prompted to choose your GA4 property and the appropriate profile for your website.
As you complete the setup, you’ll have the option to enable recommended settings or customize them to your liking.

Once you’ve finished, MonsterInsights will automatically add the necessary GA4 tracking code to all pages of your WordPress site.
To verify the connection, go to Insights » Settings in your WordPress dashboard. Under the “General” section, you should see your GA4 property listed.

That’s all there is to it. You’ll start seeing data in your Google Analytics account within 24–48 hours.
Remember, MonsterInsights offers both free and paid versions. The free version is great for getting started, but the paid version offers more advanced features if you need them.
Setting up Google Analytics 4 in Shopify

As an e-commerce powerhouse, Shopify knows the importance of good analytics. That’s why they’ve made adding Google Analytics 4 to your online store a straightforward process.
To get started, log in to your Shopify admin panel. Look for “Online Store” in the left sidebar and click on it, then select “Preferences.”
Scroll down the page until you spot the “Google Analytics” section. Here, click “Set up Google”.

You’ll now need to install the Google app, so go ahead and click the “Install” button.
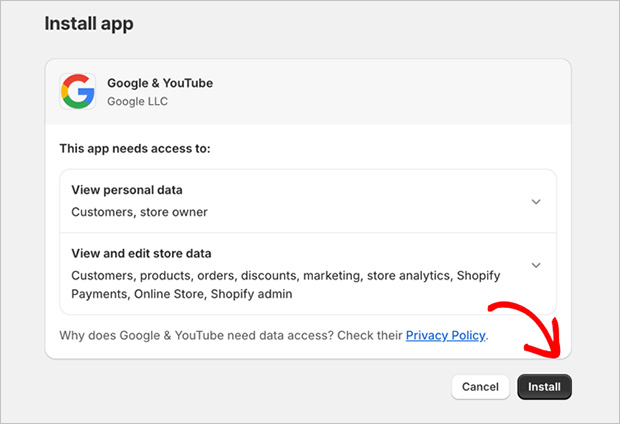
From there, connect the Google account you used to set up your Google Analytics profile.

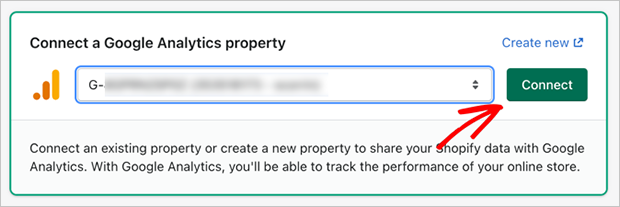
After, scroll down to the “Google Analytics” section, and you should see a dropdown box where you can choose your Analytics property. Select the appropriate property and click “Connect”.
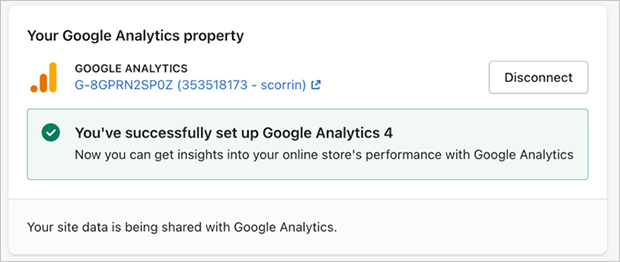
There you have it. You’ve successfully set up Google Analytics 4 on your Shopify store.
Adding Google Analytics 4 to Squarespace

Squarespace is known for its sleek designs and user-friendly interface, and their approach to analytics integration is no different. Adding Google Analytics to your Squarespace site is a simple process that doesn’t require any coding.
First, log into your Squarespace account and navigate to the site you want to add GA4 to. Once you’re in, look for the “Settings” menu in the left sidebar.

Click on it, and then find and click on “Developer Tools” in the menu that appears.
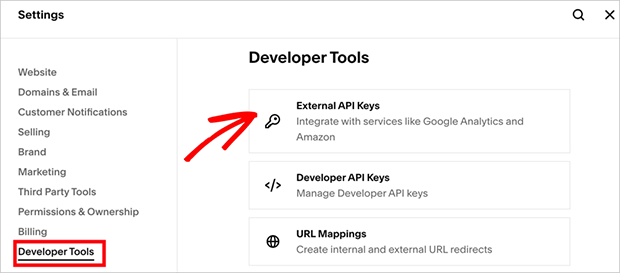
At the top of this page, click the “External API Keys” option.
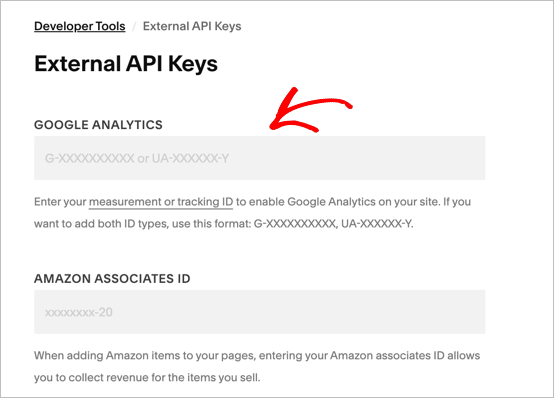
Here’s where you’ll paste your GA4 Measurement ID. Remember, this is the one that starts with “G-”.
Squarespace will now start sending data to your GA4 property.
Once you’ve added your Measurement ID, don’t forget to enable Enhanced Measurement in your GA4 property, as explained earlier. This will ensure you’re getting the most out of your analytics setup.
And there you have it. You’ve successfully added Google Analytics 4 to your Squarespace site.
Remember, it might take a day or two before you start seeing data in your GA4 reports, so don’t panic if you don’t see immediate results.
Connecting Google Analytics 4 to Wix

Wix allows millions of users to create stunning websites, and you can improve yours with robust analytics. The process of adding Google Analytics Wix is refreshingly simple.
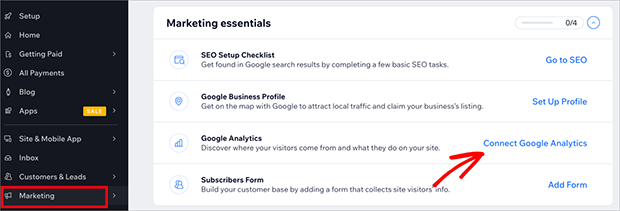
First, log into your Wix account and head to the Dashboard for the site you want to add GA4 to. Look for the “Marketing” menu in the left sidebar and click on it.
Then, find and the “Google Analytics” option and click on “Connect Google Analytics”.
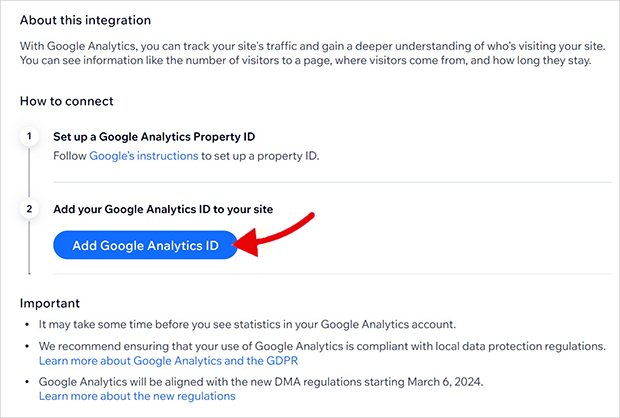
Wix will ask you to connect your account. So click the “Add Google Analytics ID” button.
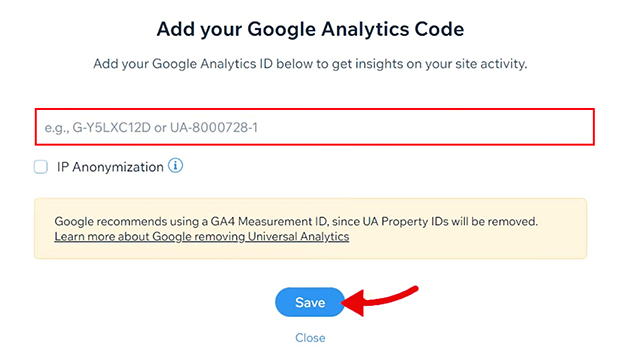
Next, you’ll need to enter your GA4 Measurement ID. Paste your Measurement ID into the field and click “Save.”
Wix will now verify the connection with Google Analytics. Once the connection is verified, you’ll see a success message.
And that’s it. Wix will now start sending data to your GA4 property.
Enabling Google Analytics 4 in Webflow

For those who love design flexibility with the convenience of a visual interface, Webflow is a go-to platform. Adding Google Analytics 4 to your Webflow site is as smooth as the platform’s drag-and-drop interface.
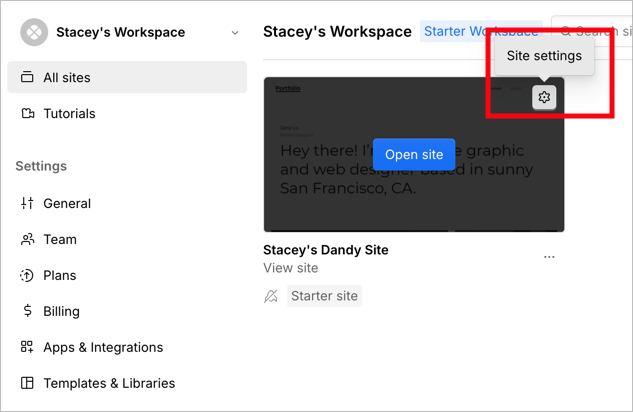
First, log into your Webflow account and from your dashboard click the Settings icon on your chosen website project.
Next, click the “Apps & Integrations” option in the left-hand sidebar. On this page, find the Google Analytics heading.
Here, you’ll find a field labeled “Measurement ID.” So, go ahead and paste your Google Analytics Measurement ID into this box.
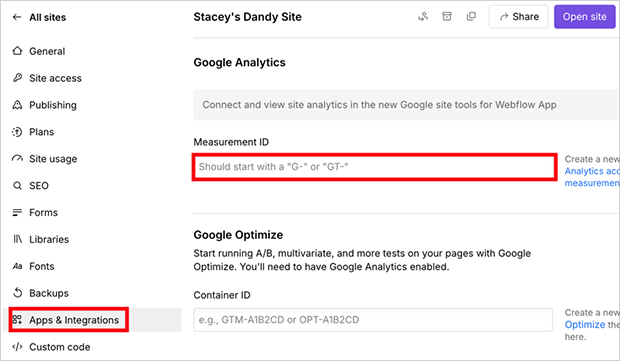
Once you’ve added your ID, click “Save” at the top of the page. Webflow will now start sending data to your GA4 property.
And there you have it! You’ve successfully added Google Analytics 4 to your Webflow site.
Testing and Verifying Your GA4 Setup
Great job on setting up Google Analytics 4. But before you pop the champagne, let’s make sure everything’s working as it should.
First, head over to your GA4 property and click on “Reports” in the left sidebar.
Then, select “Realtime Overview” at the top. This report shows you what’s happening on your site right now.
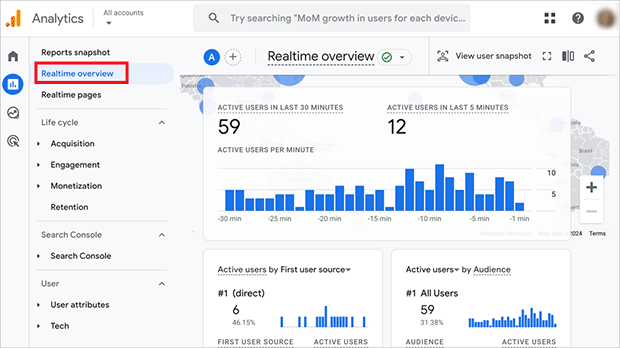
To test it out, open your website in a new tab and navigate around a bit. You should see your activity appear in the Real-time report within a few seconds.
If you do, congratulations. Your basic tracking is up and running.
But what if you’re not seeing any data? Don’t panic! Here are a few things to check:
- Make sure you’re looking at the right property in GA4.
- Double-check that you’ve added the correct Measurement ID to your website.
- If you’re using a caching plugin on WordPress, try clearing the cache.
For more advanced setups, you’ll want to verify that your events and conversions are tracking correctly. You can do this by setting up some test events and checking if they appear in your Google Analytics reports.
If you’re still having trouble, Google’s troubleshooting guide is a great resource.
Using Google Tag Manager (Optional)
If you’re looking to take your analytics game up a notch, Google Tag Manager (GTM) might be just what you need. It’s like a Swiss Army knife for website tracking, and it plays nicely with Google Analytics 4.
You might be wondering, “Why bother with another tool?” Well, GTM has some pretty cool benefits:
- Code Management: Instead of cluttering your site with various tracking codes, GTM lets you manage all your tags in one place. It’s like having a tidy toolbox for all your analytics needs.
- Advanced Tracking: Want to track specific button clicks or form submissions? GTM makes it easy to set up custom events without touching your website’s code.
- Quick Updates: Need to add or change a tracking pixel? With GTM, you can do it in minutes, without waiting for your web developer to make changes.
- Improved Site Speed: GTM is designed to load your tags efficiently, which can help keep your site running smoothly.
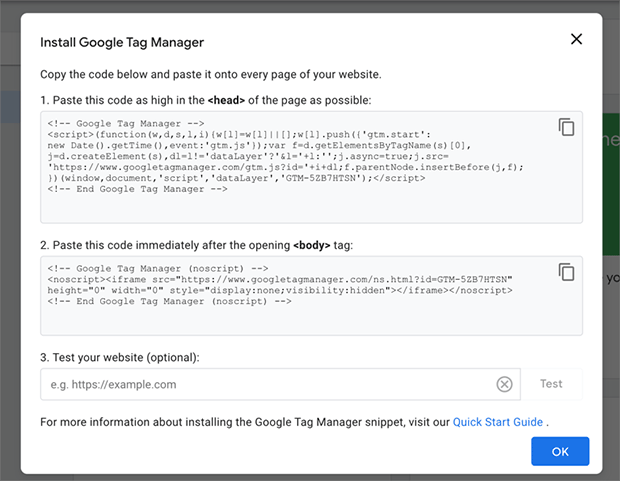
To get started, you’ll need to create a GTM account and container.
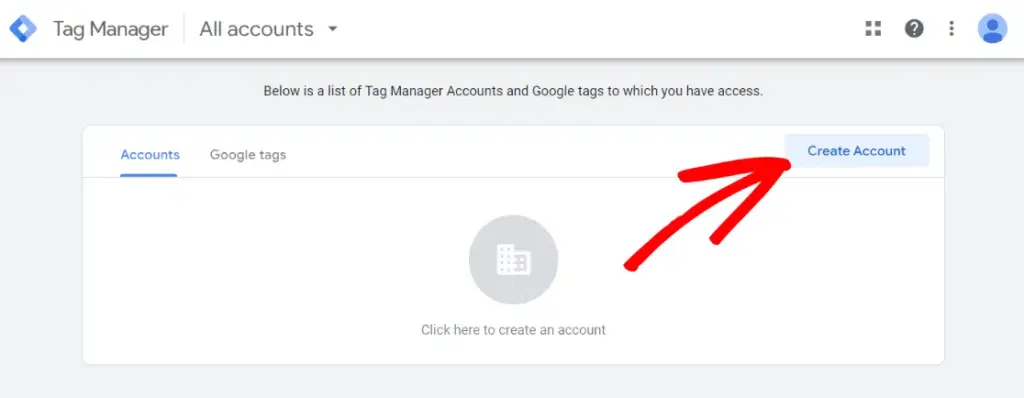
Think of the container as a bucket for all your tags.
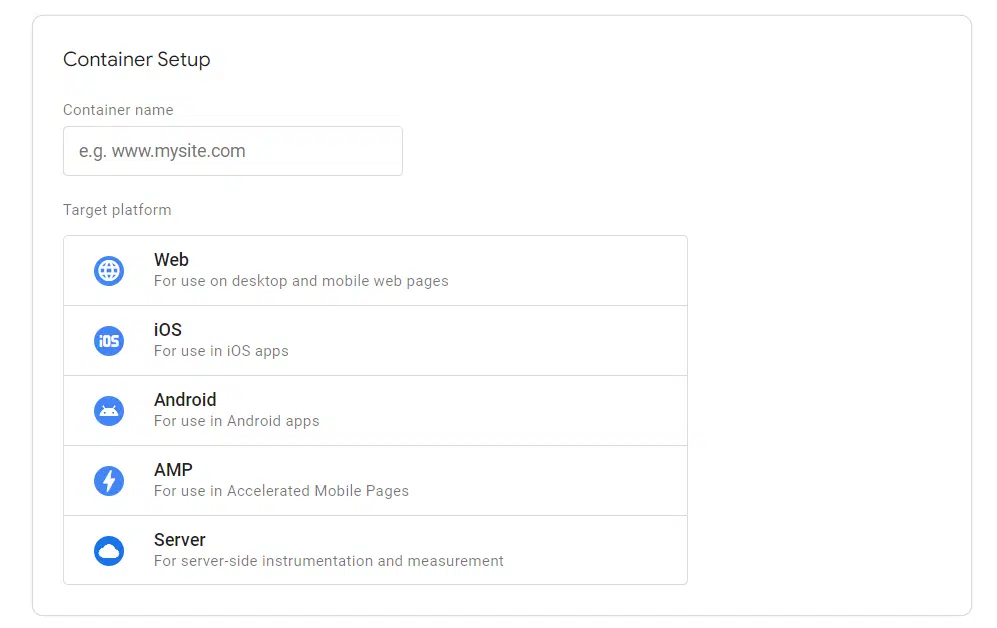
Once you’ve set up your container, you’ll add the GTM code to your website. This code goes on every page, similar to the GA4 tag.
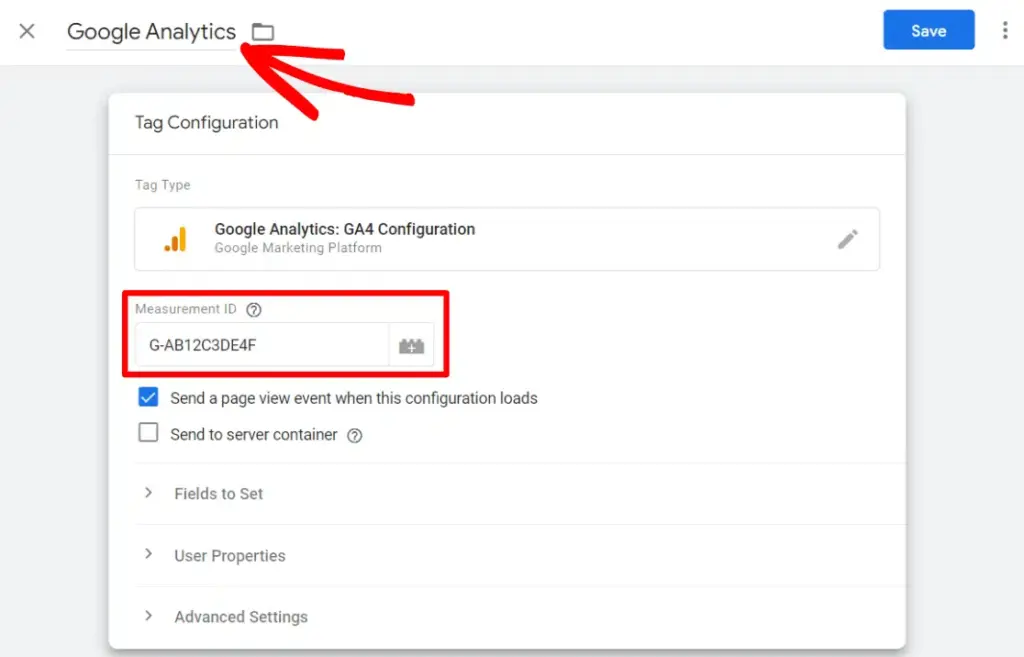
Next, you’ll set up a GA4 configuration tag in GTM. This is where you’ll enter your GA4 Measurement ID.
Finally, you’ll create a trigger to fire your GA4 tag on all pages.

Once you’ve got GTM set up, you can start adding more advanced tracking. Want to see how far people scroll down your pages? Or track when people click on your “Contact Us” button? GTM makes all of this possible without needing to edit your website’s code directly.
If you’re interested in learning more about setting up GTM with GA4, Google has some great resources:
Remember, while GTM can be super powerful, it’s also more complex than a basic GA4 setup. If you’re just getting started with analytics, you might want to stick with the standard GA4 installation for now. You can always add GTM later when you’re ready to dive into more advanced tracking.
A Simpler Way to View Your GA4 Data
Congratulations on setting up Google Analytics 4. You’ve taken a big step towards understanding your website and audience better.
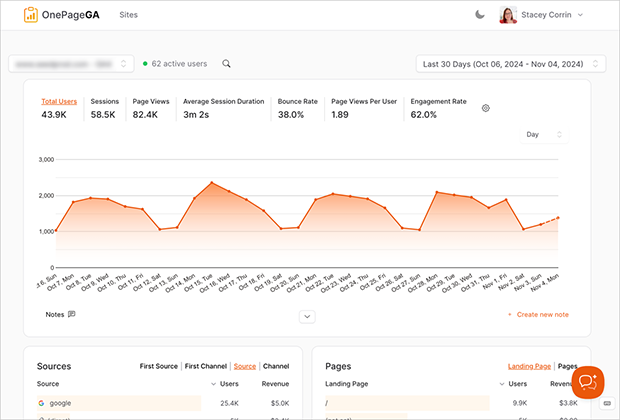
While GA4 is powerful, it can be overwhelming. This is where that solution I mentioned earlier comes in: OnePageGA.

It’s designed to simplify your GA4 data, presenting key metrics like total visitors, top traffic sources, and most popular pages on a single, easy-to-read dashboard.
Remember, the goal of analytics is to help you make smarter decisions about your website. Don’t get lost in complex features – focus on the data that matters most for your goals.
If you’re finding GA4 challenging or just want a more streamlined approach, give OnePageGA a try. It could be the tool you need to make sense of your data without the headache.
Ready to simplify your analytics?
Start your free OnePageGA trial today.
If you have questions or want to join the conversation, you can also find us on X and Facebook.

